

iMessage lets your new iPad send and receive SMS-like text messages, and MMS-style multimedia messages just like a phone. Instead of a phone number, however, it uses your wellhead pumper’s email address, and it only works with other Apple devices, like other iPads, iPhones, iPod touches, and the recently released Messages for Mac beta.
(Also, see our post: Oilfield Apps: GreaseBook, and other complementary oilfield apps for the (smart) independent operator)
Before you can start using messages, and sending texts, photos, videos, voice memos, locations, and contact cards, you need to set it up.
How to check and see if iMessage is already set up
If you set up your new iPad using iCloud, there’s a chance iMessage will have automatically been turned on and configured for you using your iCloud email address.
Launch the Messages app

If it works, and you see the screen below, pick a Contact to message and you’re good to go.
How to set up iMessage

If iMessage isn’t set up already, or if you want to use a different Apple ID (for example, if you use a different Apple ID for home or work, or for family and personal, or for iPhone and iPad), you’ll need to set it up Air Blower.
Note: You’ll need an Apple ID to use iMessage. This can be your iCloud ID or your iTunes ID if you have them. If you don’t have an Apple ID yet, you’ll need to create one first.
If you want all your devices to get the same iMessages at the same time — i.e. if you want your iPhone, iPad, iPod touch, and or Mac to all show you iMessages from the same account, make sure you login with the same Apple ID on all your devices. If you want to keep each device separate, so friends can choose to iMessage you on your iPhone or iPad, make sure you create and login with different Apple IDs on your different devices.
- Launch Settings
- Tap Messages in the sidebar on the left
- Toggle iMessage to On (if it isn’t already)

- Toggle Send Read Receipts to On (if you want people to be notified when you’ve actually seen, not just received their messages)
- Tap Receive AT if you want to change the email address associated with your iMessageaccount, or add additional email address to your iMessage account (for example, work and home).
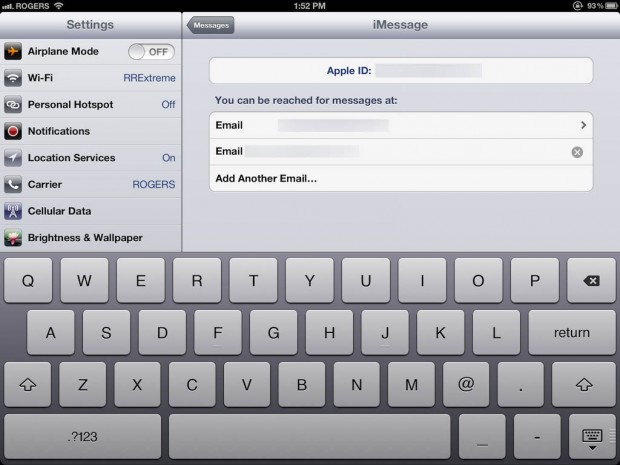
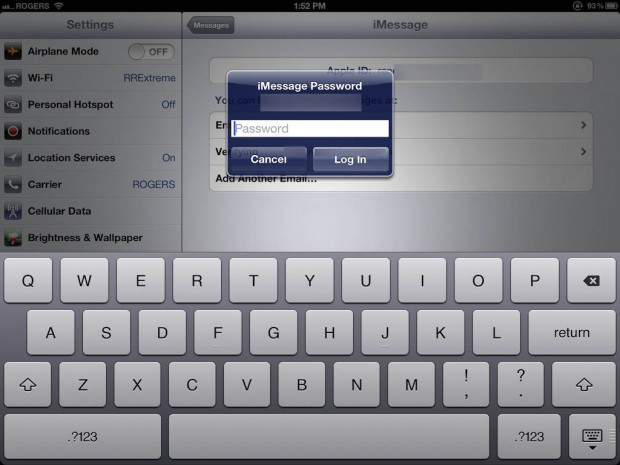
- You’ll need to Login to the new address, if it’s an existing Apple ID. If not, Apple will ask you to register it with them as an Apple ID.
- Toggle Show Subject Field to On if you want to add an email-style subject line to your iMessages.
How to activate iMessage
iMessage is a service run on Apple’s servers, and the first time it connects it needs to activate and register the Apple ID you’re using with the device you’re using. The way it does that is by having you login with your Apple ID. If the connection is ever lost for some reason, it may ask you to do it again.
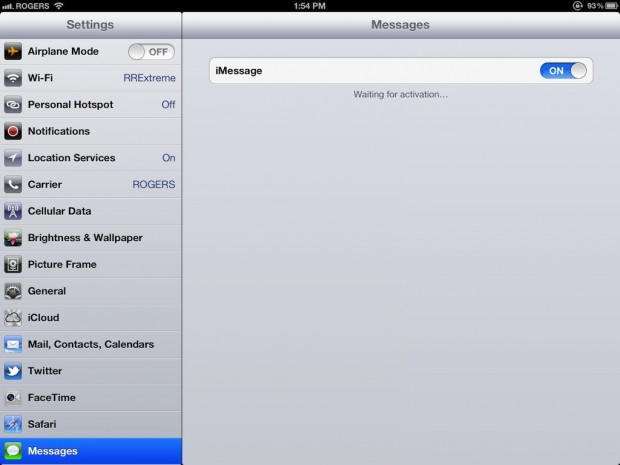
If for some reason it looks like iMessage is stuck on the Activation screen, wait for a few minutes, then try the following, in the following order:
- Turn iMessage off and then on again, wait a few minutes
- Turn Airplane mode on and then off again, turn iMessage off and then on again, wait a few minutes
- Make sure your iPad is on Wi-Fi, reboot your iPad, turn iMessage off and then on again, wait a few minutes
- Wait and try again later — Apple’s servers can get overwhelmed or experience outages just like anyone else’s
If none of that works, jump into the iPad help forum, or call us at 1-855-PUMP-OIL and we’ll troubleshoot with you. That’s it. Once iMessage activates you can send and receive texts and multimedia messages with your pumpers just like SMS and MMS.